WHAT TO KNOW ABOUT WATER HEATER MAINTENANCE AND HOW TO EXTEND ITS LIFE
Regardless of the type of water heater your home has (gas or electric), it's important to keep up with regular maintenance to keep the appliance in good condition for years.
A tank-style water heater will last about eight to 12 years, while a tankless water heater can last up to 20 years. Homeowners and DIYers with a little plumbing knowledge can handle basic water heater maintenance. However, you should have a professional inspection and service about once every four to five years.
Keep reading to learn more about water heater maintenance.
Benefits of Water Heater Maintenance
Water heater maintenance is an important part of your home's upkeep and does the following:
- Increases the unit's lifespan
- Helps the unit function at peak performance
- Lowers your home's overall energy costs
- Reduces the need for costly repairs
- Removes sediment buildup and corrosion in the unit
- Improves the general quality of your water
Water Heater Maintenance Safety
Water heaters are complex appliances and maintenance requires safety measures. They contain scalding water under pressure, which can spray from the pressure-relief valve and cause burns. Additionally, a gas water heater involves flammable natural gas that can leak from valves or pipes, causing a dangerous situation. If you find issues when conducting maintenance on the unit, it's best to leave the repairs to trained professionals to help avoid any safety concerns or problems.
Warning
When inspecting and maintaining your water heater, wear protective gloves, eye goggles, and appropriate clothing.
Water Heater Maintenance Tips
General Inspections
The water heater should be inspected visually about once every two to three months. This involves checking the water heater body, pipes, gaskets, screws, and other connections for any leaks, worn gaskets, loose connections, and any corrosion on the water heater or the pipes.
Flush the Water Heater
One of the most important maintenance tasks homeowners can do is flush the water heater about once or twice a year. Flushing the water heater gets rid of sediment build-up and helps to increase the longevity and efficiency of the system.
Turn off the thermostat, shut down the water supply to the tank, then turn off the electricity at the circuit breaker or shut off the gas supply to the system. Connect a garden hose to the drainage spigot, then run the hose to a suitable location to drain the tank. Open a nearby hot water faucet, turn on the spigot, and drain the tank to flush out any sediment.
Check the Anode Rod
The anode rod is intended to prevent the inside of the tank from corroding. However, this means that the anode rod gradually corrodes, so part of water heater maintenance is to evaluate and replace it when necessary.
Start by turning off the water heater and cutting off the electrical or gas supply to the unit. Next, use the drainage spigot and a garden hose to drain about 10 percent of the water from the tank. Locate the anode rod at the top of the tank and loosen the hex head securing the rod to the tank. Pull the anode rod out to inspect it, then either reinstall the existing anode rod or replace it with a new anode rod.
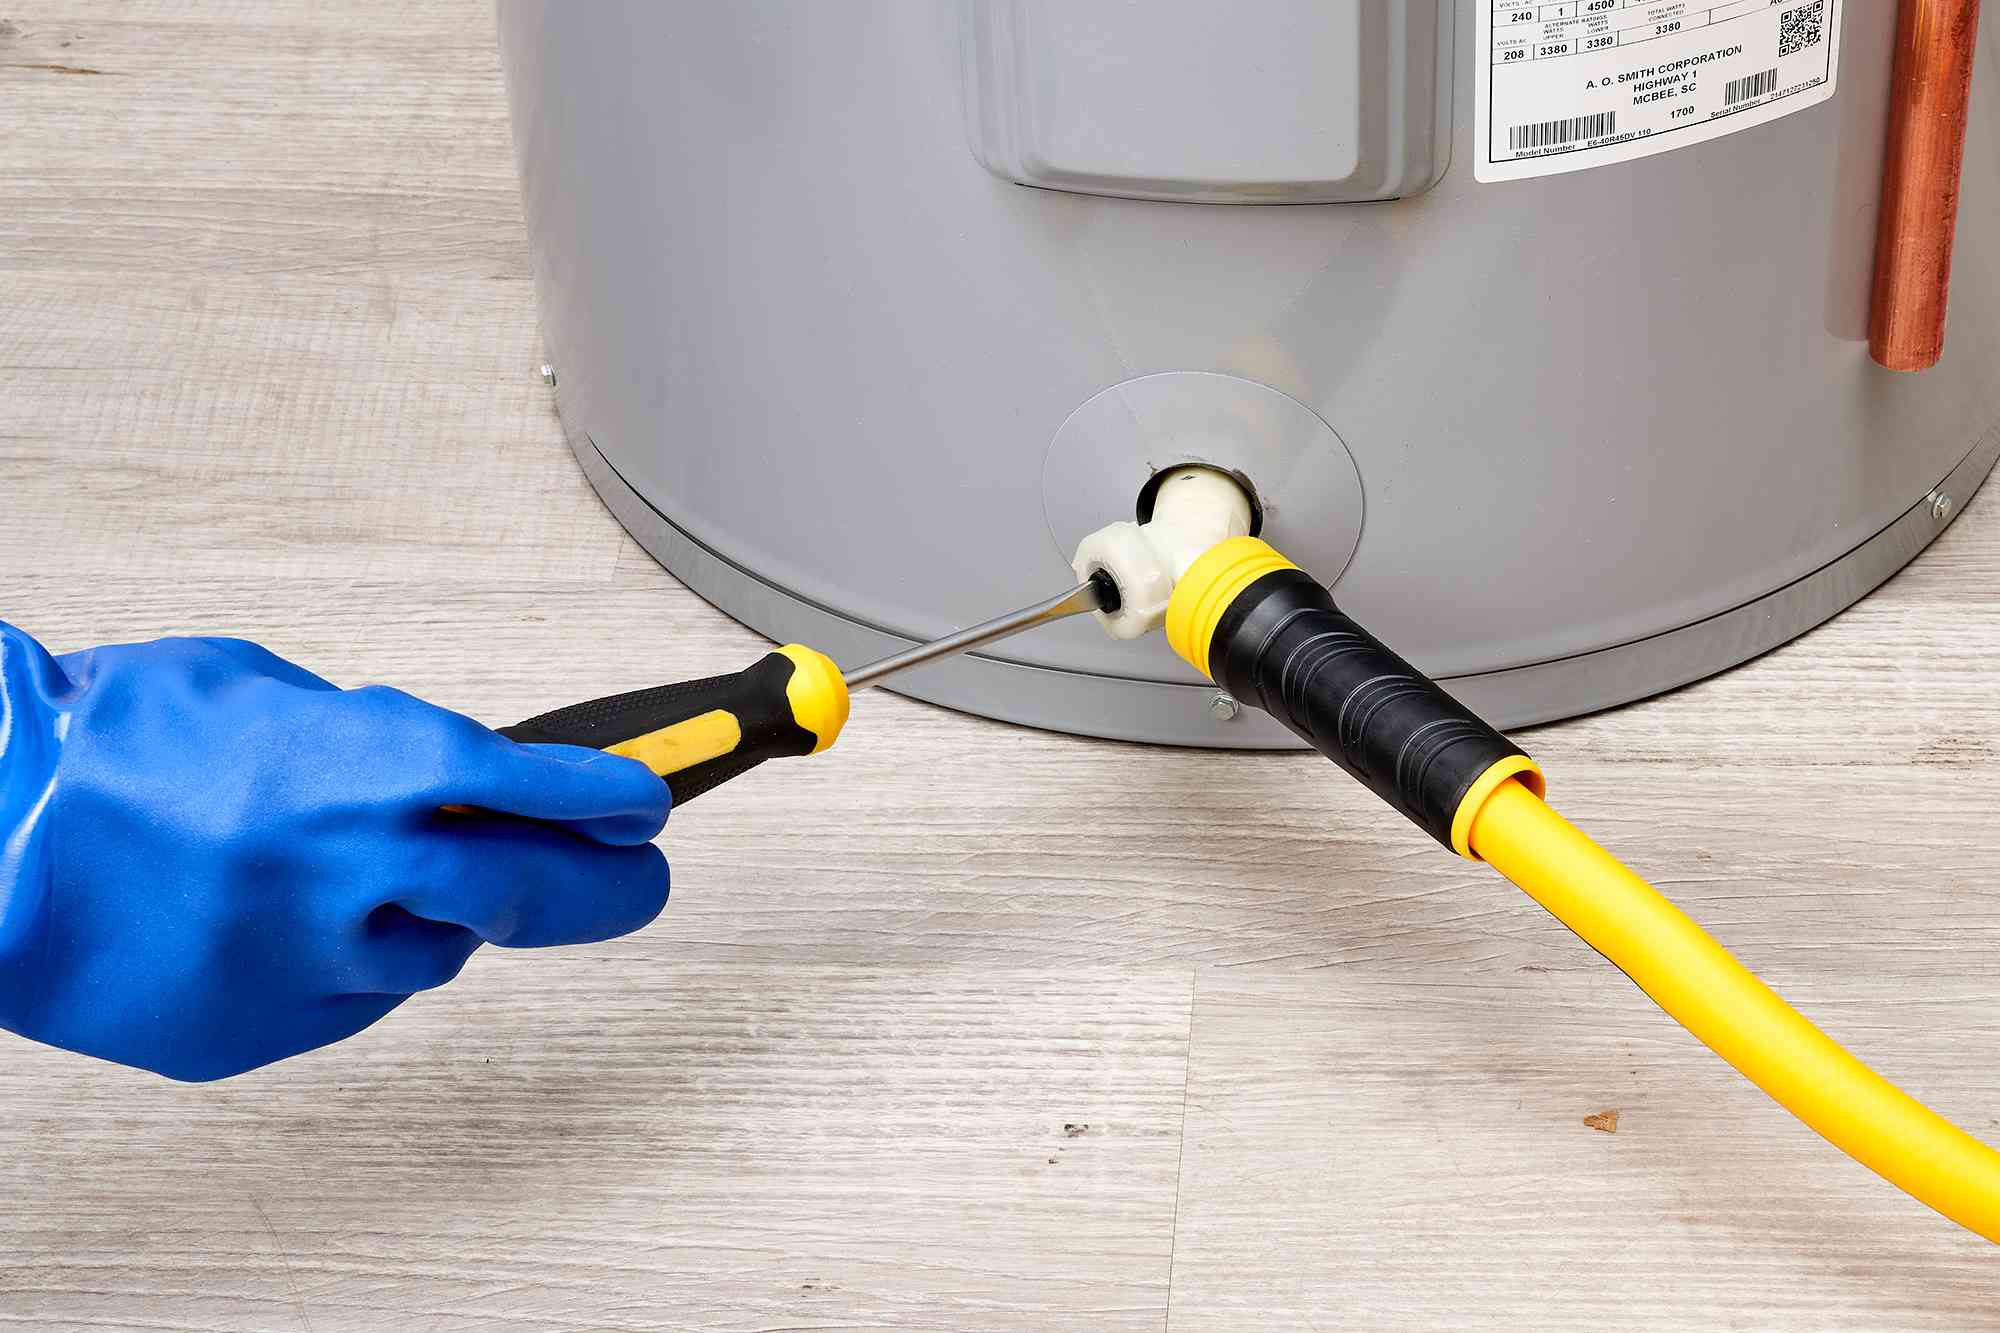
Test the Temperature and Pressure (T&P) Valve
The temperature and pressure (T&P) valve is designed to open when the pressure inside the tank is too high. Automatically opening this valve releases some of the tank's pressure. If the T&P valve is not working properly, the system may not be able to release this pressure. This can cause issues with the unit's performance, and in extreme cases, lead to the tank exploding.
Test the T&P valve about once every two to three months; it takes just a few minutes. First, locate the T&P valve on the top or side of the unit, then remove the drain pipe attached to the valve using a set of pliers or a plumber's wrench. Next, gently lift the T&P valve lever to drain a small amount of air and water from the unit. The valve is operating properly as long as water and air escape the valve when you lift the lever.
Verify the Thermostat Setting
Check the thermostat setting during a visual inspection to ensure that the unit is set between 120°F (ideally) and 140°F. If you leave your home for an extended period, consider turning the temperature down or setting the water heater to vacation mode to help save on energy bills. Also, consider wrapping the water heater with a water heater blanket to insulate the unit and reduce heat loss.
What to Expect During Professional Water Heater Maintenance
When you hire a water heater repair and maintenance professional, they will have a list of items to check during water heater maintenance. This typically includes inspecting the T&P valve, checking the anode rod, flushing the water heater, testing the thermostat, looking for leaks, and conducting a visual inspection of the pipes and water heater for signs of corrosion.
Professional plumbers with substantial experience working with water heaters may be able to spot an issue that a DIYer's general inspections missed, so hire a professional for water heater maintenance at least once every four to five years.
Frequently Asked Questions
What kind of maintenance do water heaters need?
Regular water heater maintenance typically includes flushing the unit, checking for leaks, inspecting and replacing the anode rod if necessary, testing the temperature and pressure (T&P) valve, and checking the thermostat. You may also want to add insulation around the water heater to reduce energy loss.
What happens if you don't flush your water heater?
If the water heater is not flushed once or twice a year, the sediment will accumulate on the heating element, making it more difficult to heat the tank's contents. As the scaling builds up, it acts as an insulating layer, preventing the element from heating the water. This can cause the water heater to overheat and fail if it is unresolved.
Read the original article on The Spruce.
2023-10-27T10:27:21Z dg43tfdfdgfd